Beginner’s Guide to How to Install Cabinet Pulls (Hardware)
Install cabinet pulls yourself and save money while building your new construction home! It is also a great way to refresh the look of your kitchen or bathroom cabinets. We skipped getting cabinet pulls from the builder during building our custom home and saved a lot of money. However, neither of us had ever installed cabinet pulls before. With a little research and trial and error, we were able to install all of the cabinet pulls throughout the house.
If you don’t know how to install cabinet pulls yourself, or are afraid to try, this is the article for you. I’ll explain what tools we used, how we did it. After reading the article, watch our video to see how it is done!
How to Install Cabinet Pulls
1. Tools We Used to Install our Cabinet Pulls
- Drill
- 3/16” drill bit
- Power Screwdriver (optional)
- Ratchet Screwdriver
- Safety Glasses
- C-Clamp
- Pliers
- Pencil
- Measuring tape
- Handheld Vacuum (optional)
- Cabinet Pull Installation Tool (Jig)
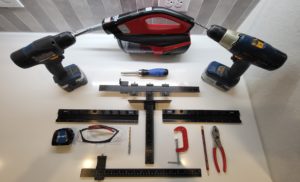
We used this Cabinet Pull Installation Jig
It came with an included a 3/16” drill bit and a tool to center punch the holes (we didn’t need to use this), and an allen wrench to tighten the screws on the jig (we tightened the screws by hand). (paid link).
As an Amazon Associate, I earn from qualifying purchases.
2. Set Up the Cabinet Installation Jig
Easy Method for How to Set Up the Cabinet Installation Jig to Install Cabinet Pulls
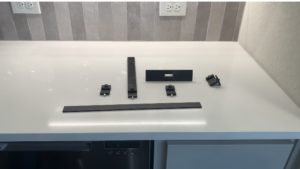
The Jig came with a 16-inch horizontal ruler, an extended horizontal ruler for oversize handles, and a 10-inch vertical ruler. We used the 16-inch ruler for most of our cabinet doors and drawers. The Jig came with 2 small brackets with holes in them, a small stabilizing bracket, and a large stabilizing bracket.
-
- Hold the 16-inch ruler horizontally and put the 10-inch vertical ruler onto the back of the 16-inch ruler at the zero mark. Tighten the screw to hold it in place.
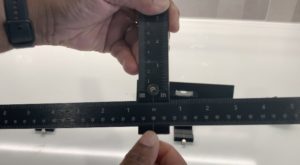
- Now slide the large top stabilizing bracket on and tighten the screw. You don’t need to worry about the measurements yet. Note: We did not use the small stabilizing bracket for the drawers.
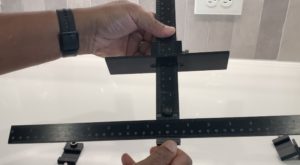
- Then slide one of the brackets with the hole in it onto the left side of the ruler and slightly tighten the screw. Slide the other bracket with the hole in it onto the right side of the ruler and slightly tighten the screw.


- Hold the 16-inch ruler horizontally and put the 10-inch vertical ruler onto the back of the 16-inch ruler at the zero mark. Tighten the screw to hold it in place.
3. Set the Cabinet Installation Jig for the Size of Your Cabinet Pulls
- Measure the distance between the center of the holes on your cabinet pulls and divide by 2. Let’s say that the distance between the center of the holes on your cabinet pulls is 5 inches. You should have 2 ½” on each side of the center zero point of the 16-inch ruler on the cabinet installation jig. Set the left and right brackets of the cabinet installation jig to 2 ½” from the center zero point of the 16-inch ruler and tighten the bottom screw to hold it in place.
- Now hold your cabinet hardware up to the 16-inch ruler, and see if the center of the holes of the cabinet pull lines up with the center line of the holes on the 2 brackets.
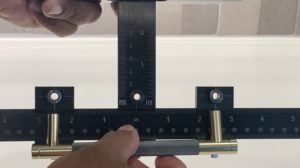
You may need to adjust the brackets slightly to get them to align with the center of the holes on the pulls. We recommend that you check to make sure that the holes are centered with the jig each time. We found that some of the measurements between the holes on our cabinet pulls were slightly off, even when we used the same size pull.
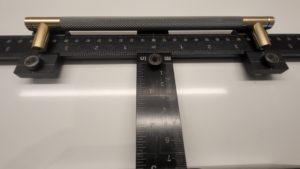
TIP: Write down the measurements on the left and right side of the 16-inch ruler for the center holes of the cabinet pulls. You will want to know this number just in case you drop the jig, the brackets slide around or you install different size cabinet pulls. We used the numbers on the bottom of the ruler (millimeters) because it was easier to get an exact number for the setting.
4. Easy Method for How to Measure Where to Install the Cabinet Pull on the Drawer
- First you need to find the center of the drawer. Here is an easy method we used to find the center of the cabinet drawer without using a calculator. Using your tape measure, measure the width of the cabinet drawer. Find the nearest whole number to the edge and count the number of the smallest increment of an inch shown on your tape measure. For example, our tape measure showed inches, quarter inch, eight of an inch, and sixteenth of an inch. We found the nearest whole number from the edge of the drawer was 14. Then we counted each tick mark up until we reached the edge of the drawer. We counted 10.

- So we divided 14 by 2 (7) and we divided the number of tick marks -10 by 2 (5).
Without moving the tape measure, we looked at the tape measure and found 7 inches, and counted 5 small tick marks, and that was the center of the drawer. We took a pencil and made a small tick mark on the drawer to mark the center.
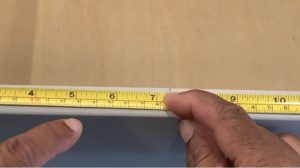
Then we measured the drawer from top to bottom. Our drawer was 6 ½ inches. So we set the vertical top bracket of our Jig to 3 ¼” and tightened the screw.
5. Easy Method for How to Measure Where to Install the Cabinet Pull on a Cabinet Door
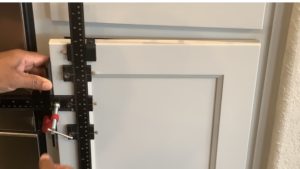
We turned the Cabinet Hardware Jig sideways so now the large top bracket butts up against the side of the cabinet door. The 3 ¼” setting of this 10-inch ruler would have our pulls too far over for our cabinet. We have shaker cabinets and we wanted the pull to be in the middle of the side panel. Our side panel is 3 inches wide, so we set the 10-inch ruler to 1 ½’.
Now to figure out how far from the top of the cabinet we wanted our pulls, we slid the small stabilizing bracket onto the top of the 16-inch ruler but we didn’t’ tighten it all the way.


The small stabilizing bracket will rest on top of the cabinet door.

Then without disturbing the settings for the holes of the cabinet pulls, slide the 16-inch ruler up or down until you find the height where you want your pulls. Remember that the length of the entire pull may be slightly longer than the space between the holes so use the setting of the holes as your guide.
TIP: Periodically tighten the screws on your jig to make sure they are secure so your settings don’t slide around.
6. How to Drill the Holes on the Drawer and the Cabinet Door
- We already set up the jig for the space between the center point of the holes on the cabinet pulls and we set the top stabilizing bracket to be 3 ¼” from the top of the drawer. (see above). Line up the white line or tick mark on the center point of the jig with the tick mark you made for the center point of the drawer. Using the C-Clamp, clamp the jig onto the drawer so the jig doesn’t move.
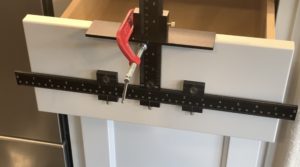
You will need to hold the drawer still so it doesn’t move when you drill the holes. Also make sure you don’t have your fingers behind where you will drill the hole. Now drill the hole through the center hole guide for one side of the cabinet pull. Reverse the drill and pull the drill bit backwards through the hole.
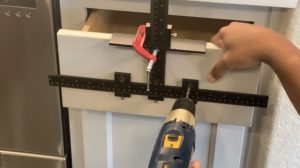
Do the same thing for the other hole for your cabinet pulls. We used the handheld vacuum to clean out the wood shavings from the inside of the drawer and from inside the holes – but that is optional.
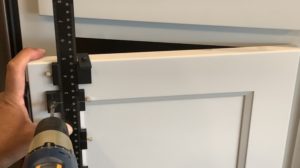
We are using the same size hardware on the cabinet door so we didn’t need to change that. We already set up our jig for where we want the hardware to be. (see above). We followed the same steps for clamping the jig in place, and for drilling the holes on the cabinet door.
7. How to Install the Cabinet Pulls
- The cabinet pulls we bought came with 2 sizes of screws. One size was shorter than the other. The longer screw was segmented into several “break points” to adjust the length of the screw to the length you need.
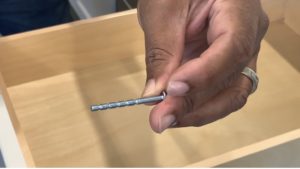
- The way to figure out the length you need is to test it out first. Screw the screw into the cabinet pull to see how much of the screw tip will go into the pull before you can’t turn it anymore. For the cabinet pulls we bought, the screw didn’t go in very far so we knew we could not have much of the screw sticking out when we put it through the hole in the drawer.
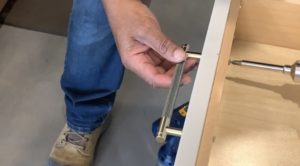
Next, put the short or long screw through the hole in your drawer or cabinet door. The short screw was the perfect length for our cabinet doors. However, our drawers have an outer wood panel and an inner box, so the shorter screws were too short. However, the longer screw was too long. Although the longer screw went all the way through the drawer, there was too much of the screw sticking out of the other side.
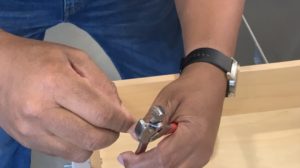
- So we used the pliers to snap off the end of the screw to make it shorter. This wasn’t hard. Just snap off one part at a time until you reach the right length.
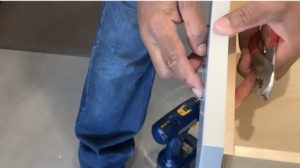
- Put the screws through the holes, and lightly screw in each side of the cabinet pull using your screwdriver. Once you know the pull is in place, press the cabinet pull flush against the cabinet drawer or door while you tighten the screw in the hole. Try to avoid overtightening or breaking off the screw inside the pull by stopping tightening when you no longer feel any resistance.
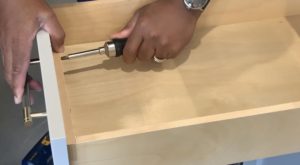
Cabinet Door
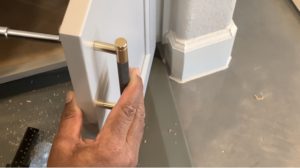 The cabinet pulls are installed and they fit and look great!
 We installed all of the hardware for our house using this method!
We hope that this article helps give you information and confidence that you can also install cabinet hardware in your home!
Best Wishes on Your Success Journey!

