


Welcome to the Ultimate Guide
IronFire Success
Inspiration, Motivation and Strategies to Overcome Obstacles and Achieve Your GoalsNew Construction Home Building
House to Home
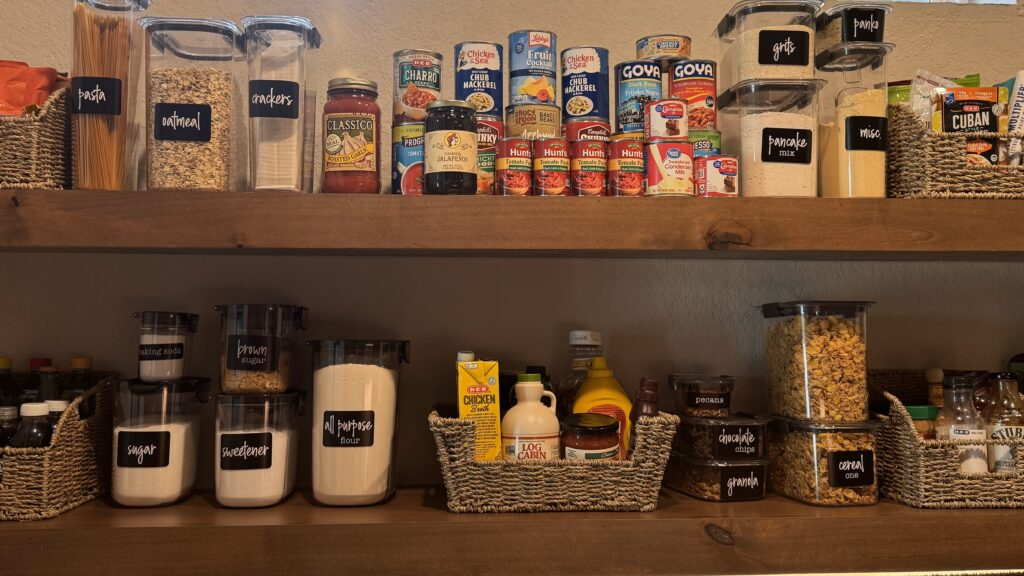
Food Storage Solutions: ProKeeper+ vs Rubbermaid Brilliance
Home Decor, House to Home / April 28, 2025 Food Storage Solutions: ProKeeper vs. Rubbermaid Brilliance I needed a good food storage solution for my pantry organization project. Because I thought these were both good products, I bought bothREAD MORE →0 Comments

10 Most and Least Used Upgrades in our New Construction Home
DIY Projects, House to Home, New Construction Home Building, Upgrades / October 31, 2024 After living in our newly constructed custom home in Texas for about 6 months, we thought about the 10 most and 10 least used upgrades we chose during construction. Choosing
7 Quick Ways to Make Your House Look Like a Luxury Model Home
Home Decor, House to Home / October 19, 2024 Do you want to make your house look like a luxury model home? Have you ever wondered what gives a builder’s model homes that inviting and sleek look? We thought
How to Fill Holes to Change Cabinet Pulls for First Time DIYers
DIY Projects, New Construction Home Building / November 28, 2023 Follow this step-by-step method to fill the holes to change cabinet pulls on dresser or cabinet drawers and doors and prepare to install new hardware. This technique works whether youLifestyle

Ultimate Guide to Royal Caribbean Cruise Ship Card Rooms and Libraries
Lifestyle, Travel / October 18, 2025 Welcome to the Ultimate Guide to Royal Caribbean Cruise Ship Card Rooms and Libraries. I like cruising, and sometimes I want to play a good card game with friends and
EZ Guide to How to Use Your Phone on a Cruise: Cellular, Ship Wi-Fi and e-SIM explained
Lifestyle, Travel / April 19, 2025 How to Use Your Phone on a Cruise: Cellular, Ship Wi-Fi and e-SIM plans explained. Cruising is a great and popular way to travel to alluring destinations while enjoying the
Celebrity Beyond Dining Guide: Where to Eat Breakfast, Lunch & Dinner w/Times and Dress Code
Lifestyle, Travel / March 15, 2025 There are so many options for Celebrity Beyond dining, it can be hard to choose where to go and when to eat breakfast, lunch, and dinner. I created the charts
How to Clean Invisalign Aligners? 5 Easy Ways
Lifestyle / May 30, 2023 Proper cleaning is essential for the care and maintenance of your Invisalign trays. They are made from plastic that is durable, yet susceptible to staining, and collecting germs and plaque.EZ Guide to How to Use Your Phone on a Cruise: Cellular, Ship Wi-Fi and e-SIM explained
Lifestyle, Travel / April 19, 2025How to Use Your Phone
Celebrity Beyond Dining Guide: Where to Eat Breakfast, Lunch & Dinner w/Times and Dress Code
Lifestyle, Travel / March 15, 2025There are so many options
How to Clean Invisalign Aligners? 5 Easy Ways
Lifestyle / May 30, 2023Proper cleaning is essential for

Should You Get Invisalign? My First 30 Days with Invisalign
Lifestyle / April 13, 2023Should You Get Invisalign? If

Job Interview? That Sounds Like A Job For My Fake Representative!
Career, Lifestyle, Motivation, Success Strategies / December 23, 2022Wondering what is a Fake

Success Strategies

IQ Tests Don’t Measure All Kinds of Intelligence
Success Skills, Success Strategies / February 13, 2023
Do IQ tests measure all kinds of intelligence? IQ tests
Read More
Make New Year’s Resolutions That Stick in 5 Easy Steps!
Success Skills, Success Strategies / December 31, 2022
For many people making New Year’s resolutions is an annual
Read MoreJob Interview? That Sounds Like A Job For My Fake Representative!
Wondering what is a Fake Representative, and why you would
Read More
How to Get a Job After Being Fired Without Lying!
Got Fired? How to Get a Job After Being Fired
Read More
Stop Sabotaging Your Success!
Overcoming Obstacles, Success Strategies / November 4, 2022
Stop sabotaging your success! I know that is easier said
Read More
Winning 3-Step Strategy to Transition to Success!
Success Skills, Success Strategies / October 30, 2022
Successful people know that having a great idea and making
Read More
Copyright © 2025. All rights reserved Design by Grace Themes